To create a viewlet, click the Viewlet button from the top right of the screen. The Create Viewlet dialog box opens.
Note: When accessed from the WorkSpace dashboard, only the Create a temporary viewlet using search option is available.

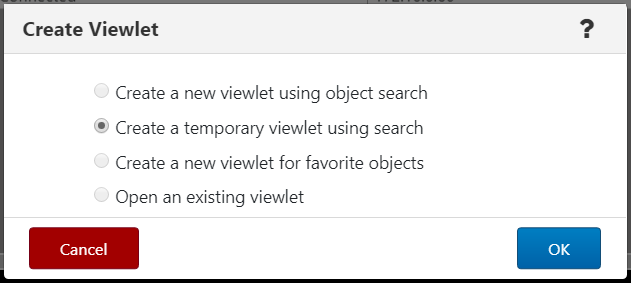
Select the mode of viewlet creation and click OK button.
Create New / Temporary Viewlets
The Create new viewlet dialog box is displayed when Create a new viewlet using object search or Create a temporary viewlet using search is selected from the Create Viewlet dialog box. If Create a temporary viewlet using search was selected, the viewlet will only be visible during this session.
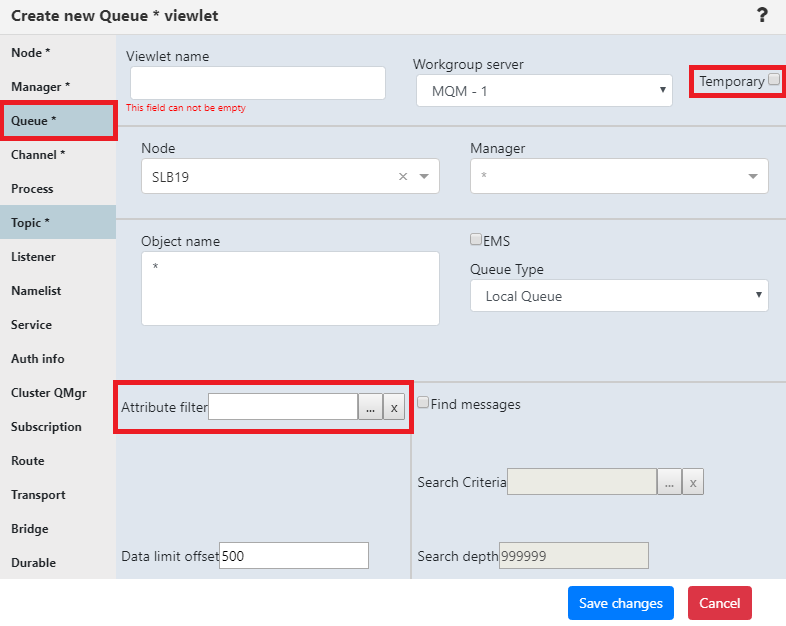
Select the object type from the list on the left (see a screenshot below) . Objects with an asterisk are objects for both MQ and EMS. Transport, Route, Bridge and Durable are EMS only objects.
After selecting the object from the left side of the screen, complete the fields as required. To make the viewlet temporary, enable the Temporary check box. The Attribute filter <a link to an article about Attributes> is useful to search for specific cases. If you would like to create a viewlet with scheduling functionality, select a Workgroup server from the drop-down which has been configured for scheduling. Click Save Changes when done. The viewlet will appear at the bottom of the current dashboard.
Create a New Viewlet for Favorite Objects
The Add favorite viewlet dialog box is displayed when Create a new viewlet for favorite objects is selected from the Create Viewlet dialog box.
(missing inf0)